We’re passionate about additive manufacturing and your 3D printed parts. We actively encourage our customers to challenge what can be achieved with this growing technology. Having invested in the latest post-processing machinery, such as the DyeMansion Powerfuse S, you’re now able to create water-sealed parts, with near injection moulded quality, without the need for expensive tooling and long lead times.
Enhancing your 3D printed parts
One question we often get asked is, “What else can be done to further enhance a 3D printed part?”. In this blog post we’ll delve deeper into the variety of techniques and options that are available.
Dying 3D Printed Parts
A popular option is dying parts, in the world of additive manufacturing. There are two main ways in which you can dye your parts: either by pot dying or by using an automated dying solution, for instance the DyeMansion DM60.
Pot dying works by heating a measured amount of water to 80 degrees, with a certain amount of dye. The parts are then soaked for 8 minutes. After this, the parts are then left to soak in water at a temperature of 60 degrees for 2 minutes. This helps remove any stains that may appear on the parts.
The DyeMansion DM60 works by using a cartridge filled with dye. The parts are then submerged in a tank of water. A chemical reaction, using heat and pressure, results in dye penetrating the part at a depth of roughly 0.2mm.

Hydro Dipping 3D Printed Parts
Applying hydro dipping offers a unique and bespoke look to your 3D printed parts. When used in combination with VaporFusing you can achieve remarkable, stunning parts.
But what is hydro dipping and how does it work?
A pre-printed film is placed in a large tank of water, on the surface. The film is then allowed to soak for around 1 minute and sprayed with a special activator, which changes the film into a liquid state. The part is then dipped into the liquid, rinsed off and allowed to dry. An additional process can be applied after, such as a lacquer to toughen the surface.
Advantages
- You can achieve beautiful looking parts that are not possible with other applications, such as spray painting or dying.
- Let your imagination run wild and create custom-made films.
- The water transfer process means you can get complete coverage of the pattern on your parts.
- Hydro dipping is extremely durable when the correct lacquer is applied.
- You get no cutting edges.
Disadvantages
- Hydro dipping is labour-intensive and requires a specialist operator, which results in a higher cost when compared to other means of finishing your parts.
- There can be some trial and error involved when hydro dipping a part for the first time.
- Hydro dipping is a highly skilled process and requires time to learn the skill.
- If the 3D printed part does not have a smooth surface, adhesion of the film and final quality of the finish becomes less desirable.

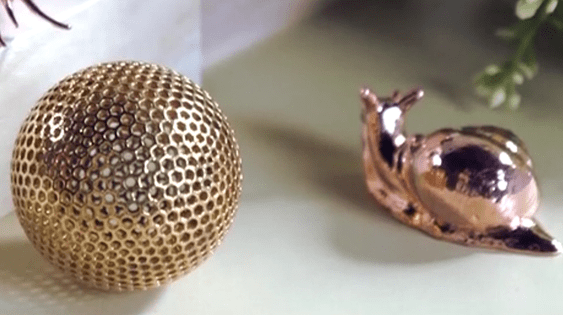
Electroplating 3D Printed Parts
Electroplating is a chemical process that coats an object in a layer of metallic material. This uses a process known as electrolysis.
During the process, the desired metal is transferred from an anode to a cathode (the part that is to be plated).
This is achieved by placing the anode and the cathode in an electrolyte chemical bath, which is then exposed to an electric current. This results in a positively charged anode and a negatively charged cathode. Due to the electrical current, negatively charged ions move to the anode and positively charged ions move to the cathode, resulting in the cathode forming a metal coating.

Applications
Industries that could benefit from electroplating 3D printed parts are aerospace, medical, dental, jewellery, art and automotive.
Advantages
- Increased lifespan, strength, and conductivity of parts.
- Increased resistance to environmental factors, including chemical exposure, UV exposure or corrosive environments.
- Able to make parts corrosive resistant, ideal for the medical industry, such as medical implants.
Disadvantages
- The main disadvantage revolves around the hazardous nature of the process. Hexavalent chromium is given off, exposure to which is potential hazardous, if the correct advice given about ventilation is not followed.
- The process can be very difficult and due to its hazardous nature, it can be hard to achieve the best and safest results. Always seek the advice of a professional electroplating company.
- HP Multi Jet Fusion and VaporFusing are ideal for electroplating because it creates 3D printed parts with injection moulded quality, resulting in a smooth surface that makes the transition between the plastic and metal much easier.
VaporFusing also creates watertight parts and protects the part when it is submerged in the chemical bath.
Spray Painting 3D Printed Parts
Spray painting 3D printed parts is a popular process and involves a device that sprays material, such as paint, varnish etc. through the air onto the surface of a part. Colour options are very varied.
Advantages
- When compared to other traditional painting methods, spray painting is much quicker.
- Spray painted parts dry quicker and with less odour.
- As the paint is sprayed more evenly across the part, you can achieve a much higher quality finish.
- Spray painting is a very cost-effective solution if you have many parts that need painting, due to the speed at which the spray gun can apply the paint to a surface.
Disadvantages
- Good ventilation is required as particles from the aerosol will enter your airways and can cause serious health issues.
- If using an aerosol spray paint, volatile organic compounds (VOCs) can frequently be found in these substances, which are harmful to the environment.
Final Thoughts
As you can see there are many further ways you can post-process your parts – Anything is possible!
The solution you apply is very much dependent on your end goals, whether that is finish, strength, or function.
Some questions you should ask yourself:
- Is your end goal a functional part?
- Is your product an end-user part?
- Are your parts for heavy industrial use?
- Is my part a high-value bespoke part?
- Does my part come in any contact with fluids?
These are the many questions to consider, when deciding on the best process to finish your 3D printed part.
Here at All 3D Labs, we are more than happy to help guide you through this process, as well as give you the best advice and the right solution for your application.
Being able to offer HP Multi Jet Fusion and Dyemansion VaporFuse in-house, allows you to achieve near injection moulded quality with a quick turnaround.
For further information feel free to contact us at info@all3dlabs.com and for a free online quotation please use our 3D printing online quotation tool.
Read more news from All 3D Labs here.
![]()